While waiting for the rest of the bricks to arrive there´s not much I can do, but hubby has been busy with the walls. It took him a day to build the bay window for the left hand front - still not completely finished but we´ll have to wait for the stone cladding for the bottom part of the wall to arrive.
 Two days work bricklaying
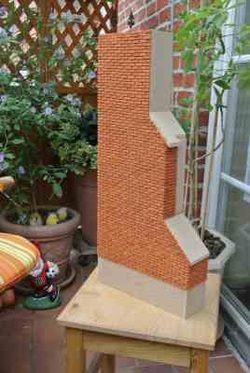
 The weather has been fine and warm all weekend, so I sat on the balcony "laying bricks". It´s not a work for the fainthearted - the brickslips are very tiny! I decided on the Tudor red from Maple Street - trouble is I need more bricks and have to wait five weeks because they are out of stock ... There´s enough to do though, so I won´t get bored.I have finished one side of the large chimney, leaving the bottom free for some York stone cladding to go there all around the house. When all the brickwork is finished and pointed the slates go on the roofbits, that will also be a job for me - the fine details are left for me to do.

In the close up you can see that the bricks look real - all we have to do now is wait for the grout to arrive so we can point them.
It´s fun working with them - they cut really easy, so creating half bricks and slanting the edges can be achived with a carpet knife.
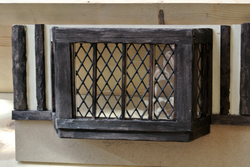
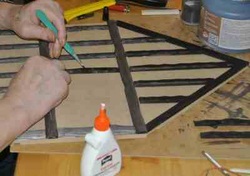 The first beams look good
 Before we put the walls up we have to stick the beams to the outside walls. Tony is shaving bits of the sides to make them look as they would have been in Tudor times - roughly hewn out of oak beams. Finally he applied a coat of dark woodstain, wiping it off straightaway before it dried to let the wood grain come through and make them look weathered.
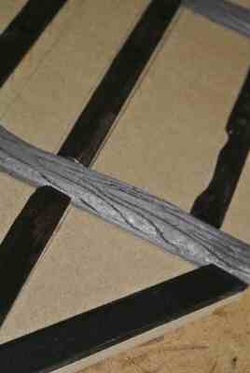
Looking good so far - but still a lot of beams to stick, model and paint.
The photo makes the beam look a lot lighter than it appears in reality, but they look really good and aged.
When the beams are in place we (or hubby shall I say ) will have to apply the "wattle" to the spaces in between. I have bought special wallpaint for this, which is very thick and meant to give walls a structured look. I have also toned it down with some paint to make it ivory and not stark white, giving the house a more natural look.
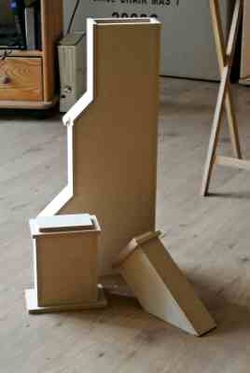 First steps - the chimneys!
 While I´ve been busy earning the money to buy all the things we want for the house hubby has been busy unpacking and starting on the house.
First thing up: the chimneys! It´´l be my job to add the real tudor brickslips to the outside - that´ll have to wait for the weekend though.
The bits are thankfully marked in pencil, so identifying the correct parts has proved easier than we thought. The fit is perfect, and glueing everything together didn´t prove much of a challenge.
You can already see it´s not going to be a small house - but the size of 1:12 gives you more scope to add realism.
 RSS Feed